


I will never forget how intimidating my new DSLR camera felt when I first unboxed it. So many buttons and wheels.. and this thing was so much bigger than any camera I had ever used. The only cameras I was familiar with were an old point and shoot from college and my iPhone camera.
I watched SO many tutorials on YouTube to try to figure everything out and use the camera.. and they were very helpful but I am a hands-on learner so I started practicing with what I knew. I started in Aperture-Priority mode. This showed me my camera and lens' potential. I was blown away at how much better the images looked compared to when I had the camera in Auto mode.
Once I mastered Aperture Priority mode, I started learning manual mode. Looking back, I do not know why I was so scared of going manual. Controlling everything about every single click of the shutter just seemed impossible. How did photographers do it? How does anyone master their craft? Practice. I started practicing. ALL. THE. TIME. I drove my family crazy (and still do) begging them to be my subjects or snapping away anyways like the paparazzi.
And I used to be self-conscious about being the photographer in the room.. not wanting to annoy anyone but now I really don't care. This is my passion and I am owning it. In 20 years when my family looks back on these photos I know they will be thankful for them and that's how I am always thinking. Ok, sorry for the tangent.. back to how I got started in manual mode.

The first picture I took with my DSLR that I was really happy with! This was taken in Aperture Priority mode with my Nikon D5300 and Nikon 50mm f/1.4.
Once you are getting the hang of manual mode, it is also a really great idea to challenge yourself with different lighting situations. Take photos in low light, high sun or harsh light, golden hour, cloudy days, artificial light, after sunset, etc. All of these different lighting situations will help you learn your settings and what works.
One of the ways I got myself into different lighting situations was by starting my 365 project. I have to take at least one photo every day. Even the dark, rainy days or the days when it's 9:00pm and I realize I haven't taken a photo yet. Forcing myself to shoot in these situations has helped me so much. Now, I can walk into a lighting situation and already know approximately where my settings will be which is very helpful when you have a fast toddler you are trying to capture :)
Here are some examples of photos I have taken in different light situations and the settings for each.
Low Light
Low Light - ISO 1600 f/1.4 1/13s SigmaArt 35mm

Low Light - ISO 1250 f/1.4 1/250s SigmaArt 35mm
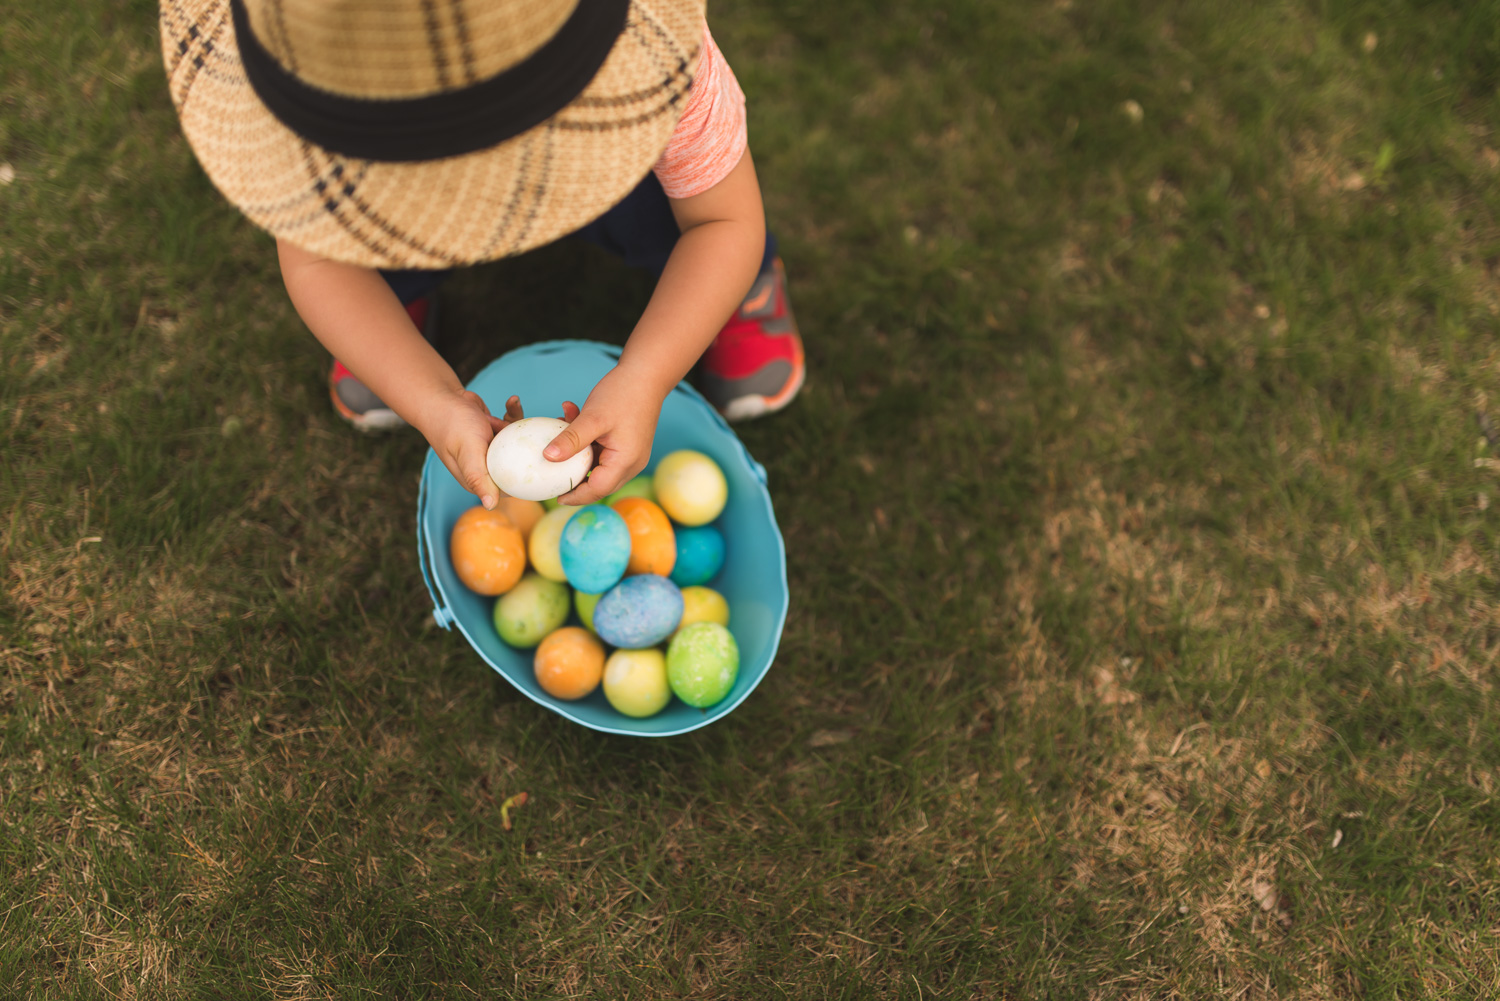
Harsh Light

Harsh Light - ISO 100 f/2.5 1/640s SigmaArt 35mm

Harsh Light - ISO 100 f/2.0 1/4000s SigmaArt35mm
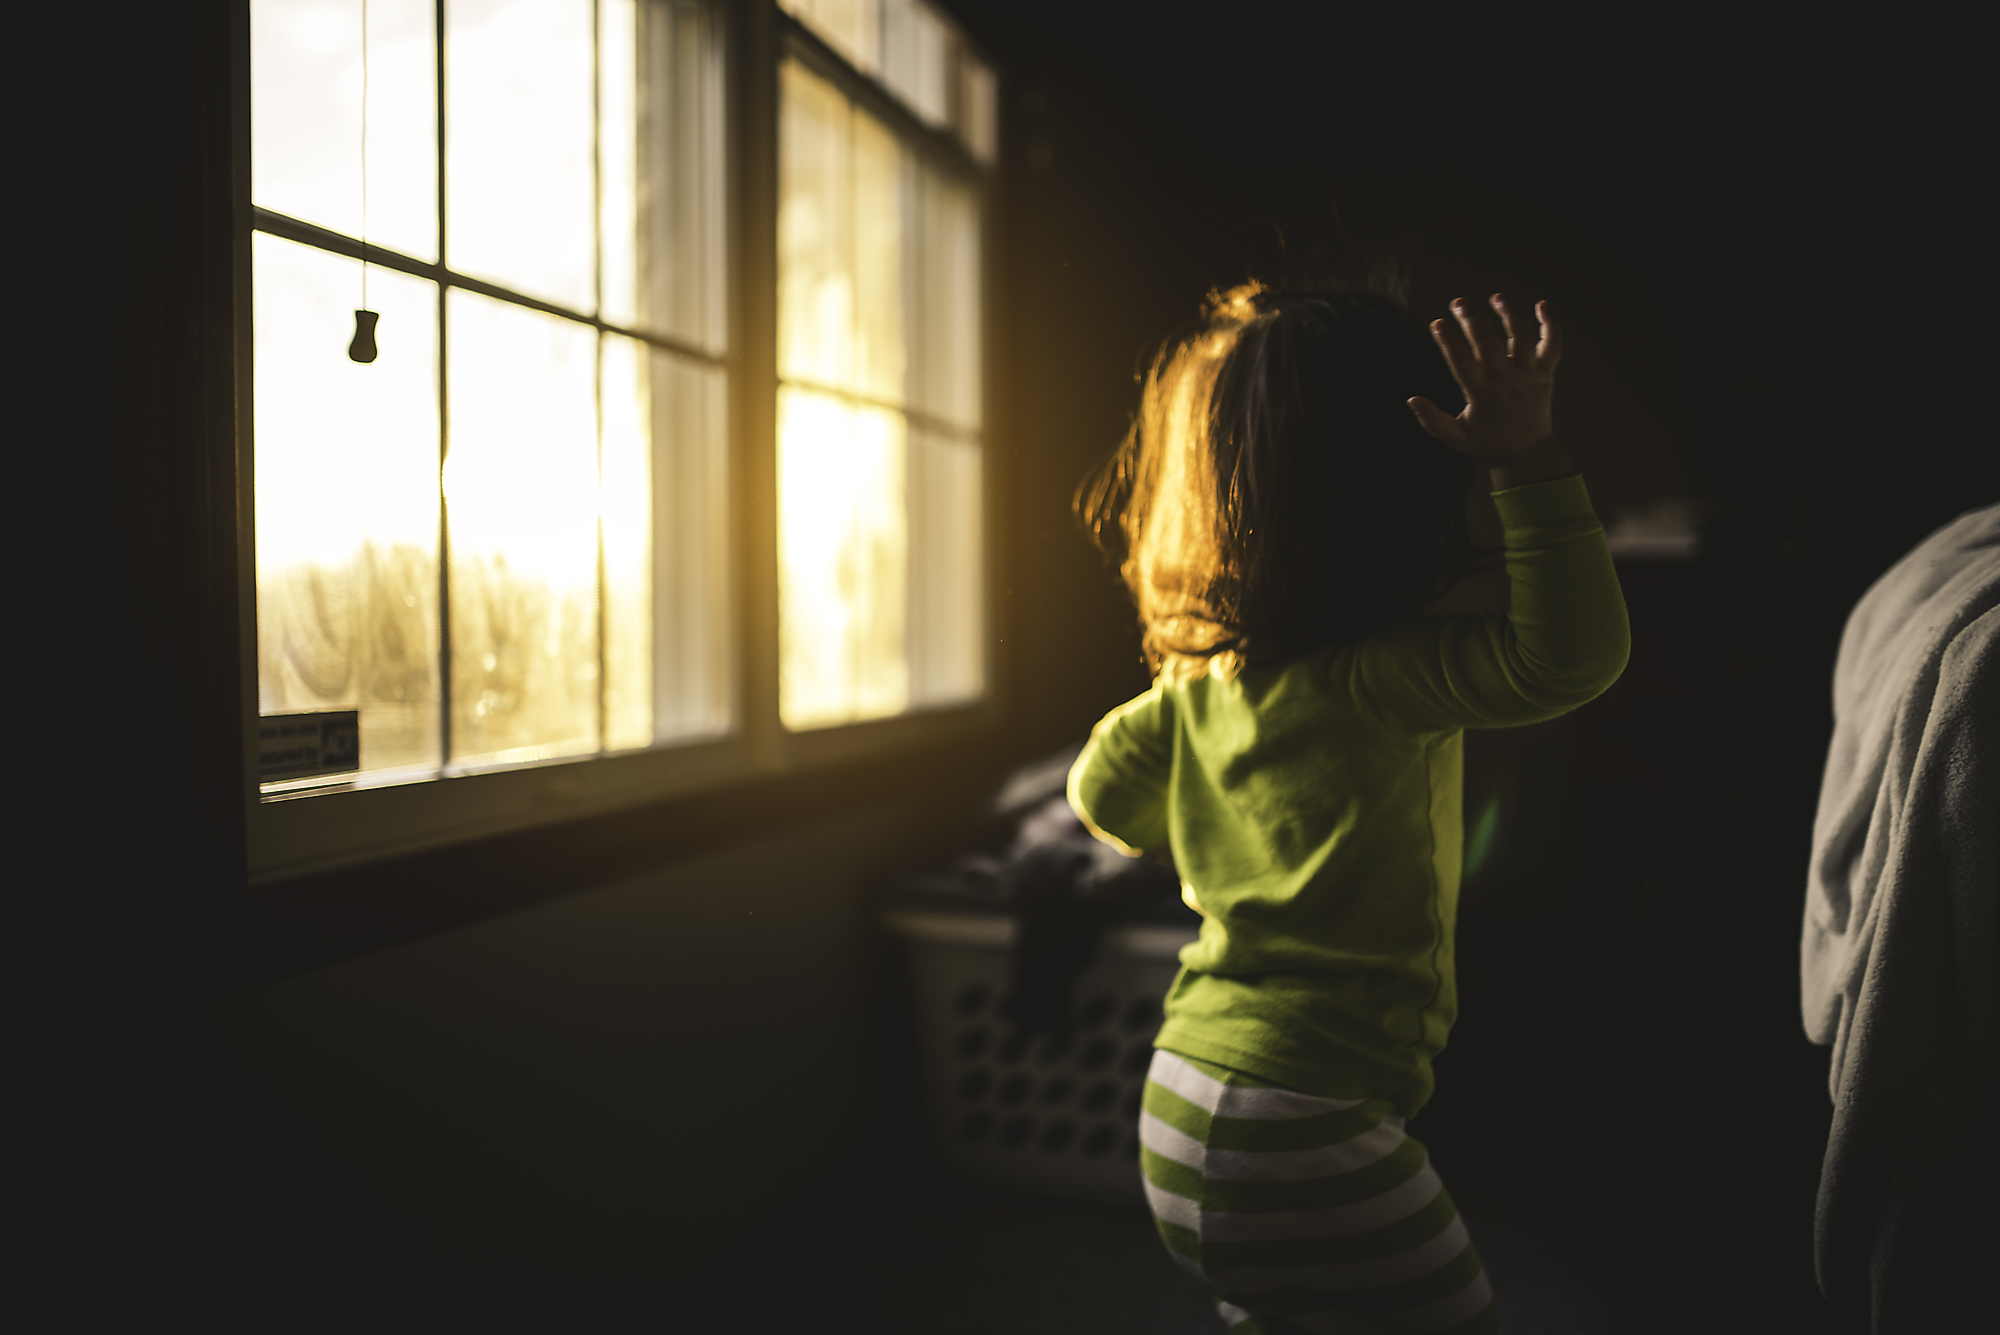
Golden Hour

Golden Hour - ISO 160 f/1.4 1/320s SigmaArt 35mm

Golden Hour - ISO 100 f/1.4 1/640s Nikon 105mm
Cloudy Day
Cloudy Day - ISO 100 f/1.4 1/800s SigmaArt 35mm

Cloudy Day - ISO 160 f/1.8 1/320s SigmaArt 35mm
Artificial Light

Artificial Light - ISO 500 f/2.0 1/320s SigmaArt 35mm
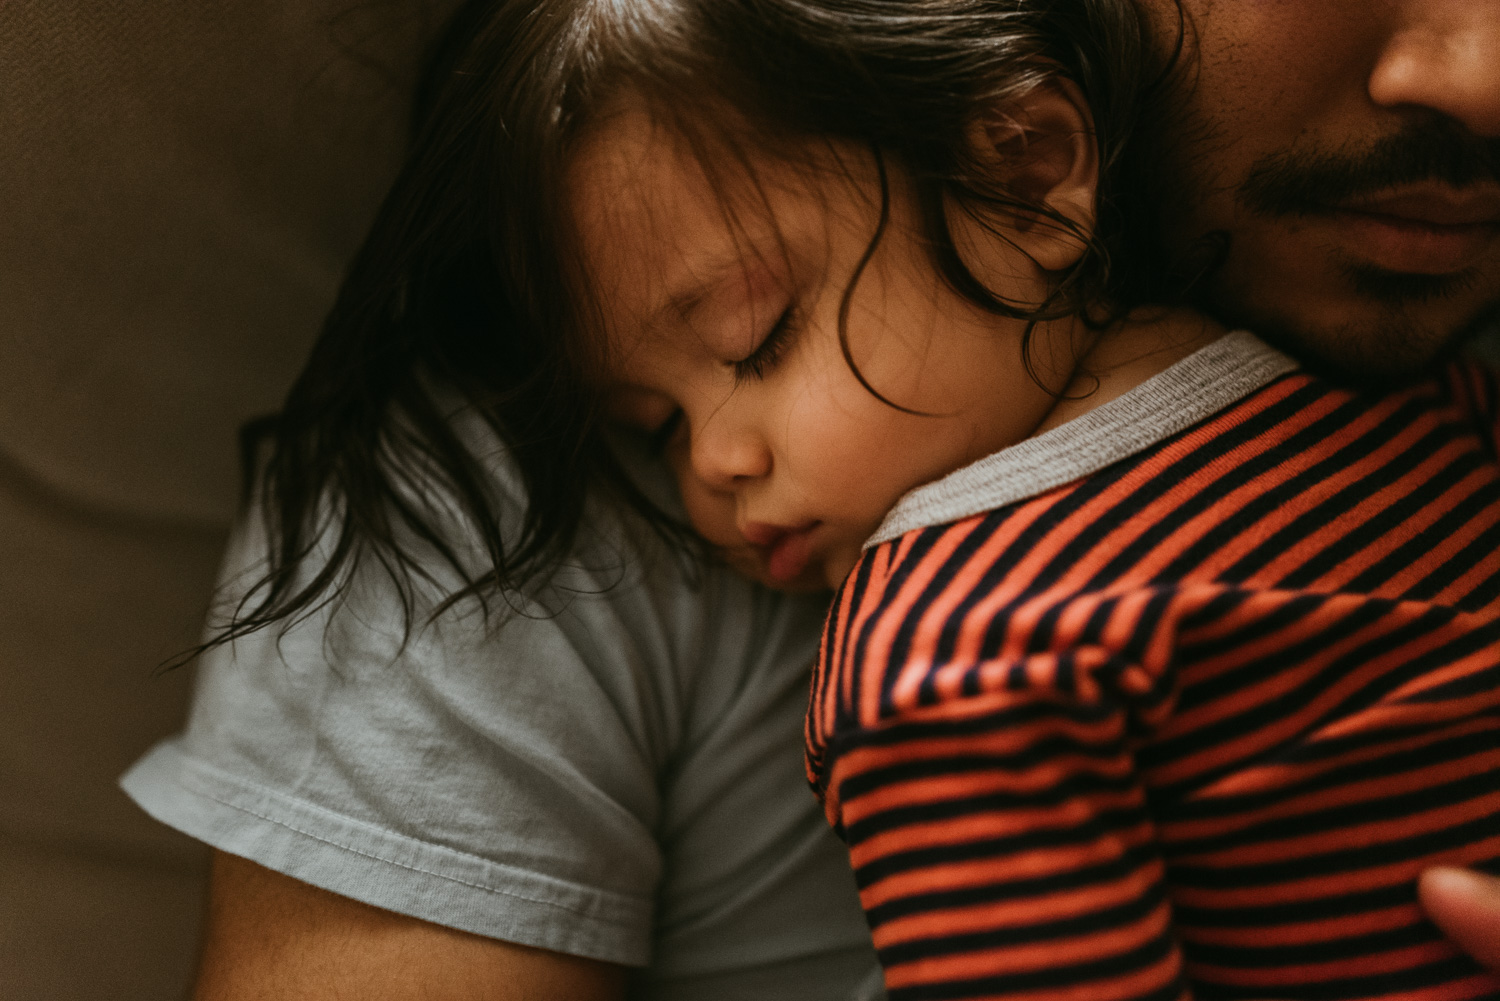
After Sunset

After Sunset - ISO 8000 f/1.4 1/100s SigmaArt 35mm
If you are on the fence about diving into manual mode with your camera, I want you to know that yes, it can be intimidating, but with lots of practice and putting yourself in various lighting situations you can quickly master it!
For more on what I know about manual mode click here
Thanks for stopping by.. If this blog post helps at least ONE person, I will be happy :)